
- You are here:
- Home »
- 3.1 Connecting to Xero
3.1 Connecting to Xero
Setting Up Xero
Click on destination settings, then change the url in the browser bar to https://invoicesync.net/settings/?tab=dest&auth=2 and hit enter. This will open a pop-up window that will prompt you to log into your Xero account. You will need to choose the company you want to link to (in most cases, this will only be one company), then authorise InvoiceSync to connect to Xero.
Setting Up InvoiceSync
Back in InvoiceSync, Go to the Settings -> Destination Settings menu option.
- Select the default Account Code that you’ll want all invoice line items to be recorded against. In most cases, this will be 200.
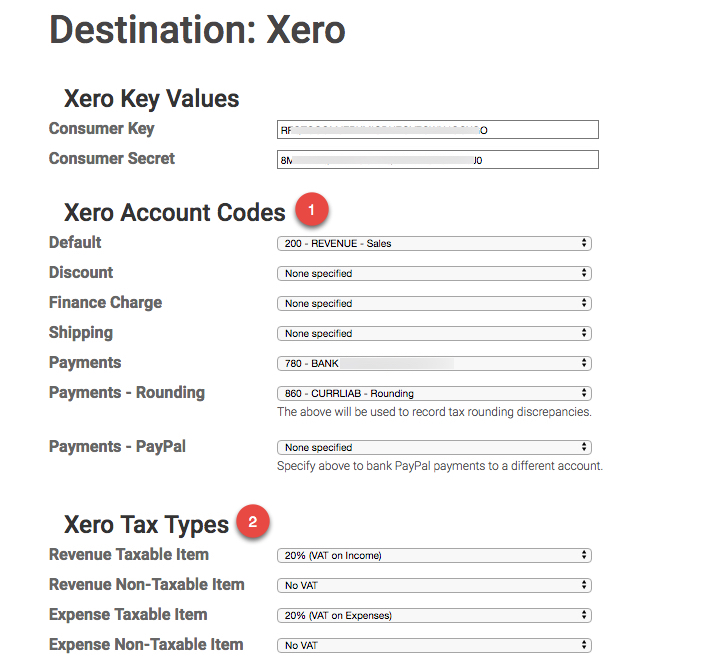
Optionally, you can specify different account codes for discounts, finance charges and shipping charges. If you leave them blank, those line items will also be recorded against your default Account Code. - Next, select the tax code to use when applying sales tax to taxable invoices. This is taken directly from your Xero application.Then, select the tax code to use that signifies zero sales tax, which is applied to line items that do not incur sales tax. Again, this is taken directly from your Xero application.
- Finally, select the status that all new invoices will be created with – either Draft, Submitted or Authorised. Beware – if you select Authorised, it will not be possible to amend or delete the invoices that InvoiceSync creates, you will only be able to void them.
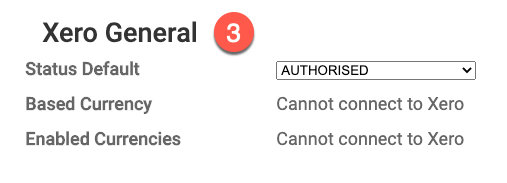
We highly recommend you set the status to DRAFT to start with and then create at least one, possibly more, test invoices in Infusionsoft and sync these over manually. This is covered in more detail under 5. What Happens Next?
Finally, click Save Changes.