
- You are here:
- Home »
- 4. Setting Up Synchronisation (First-Time Settings)
4. Setting Up Synchronisation (First-Time Settings)
Go to the Settings -> Sync Settings menu option.
If you’ve not configured this already, you’ll see the First-Time Settings screen.
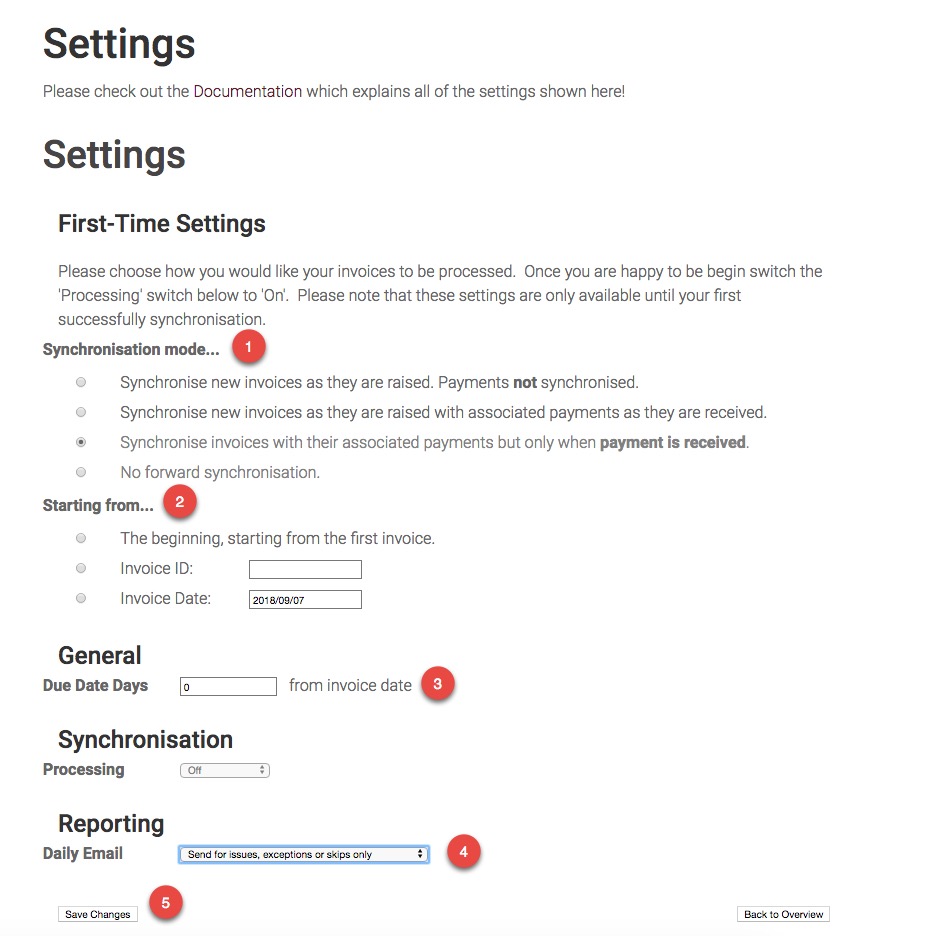
- Select whether to synchronise just invoices or payments as well and if the latter, whether to synchronise invoices as they are raised or only when payment is received.
- Select when you want synchronisation to start from. All invoices newer than the selected invoice or date will then be synchronised automatically – so you can synchronise historical data if you want. You can choose to go right back to the first ever invoice, or select an invoice ID, or invoice date.
- Select the number of days that will be added onto the invoice date when creating a Due Date for the invoice.
- Select whether to receive a daily email or only receive an email for issues, exceptions or skips. We would recommend the latter.
You must click the Save Changes button at this point before you can enable synchronisation.
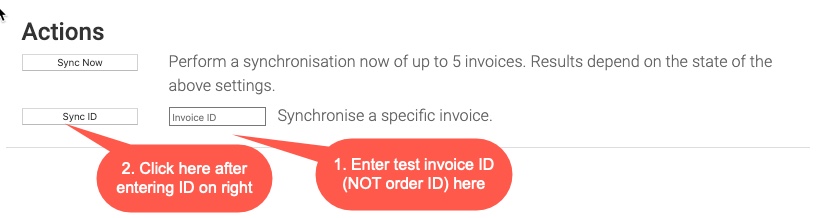
At this point, it is HIGHLY recommended that you create at least one test invoice in Infusionsoft and sync it to Xero or QuickBooks Online BEFORE switching processing on. To do this, create the invoice in Infusionsoft, make a note of the invoice number (which is usually the same as the order number but can sometimes be different), then go to the InvoiceSync Dashboard, enter the number in the field at the bottom left and click on Sync ID.
Check that the invoice is appearing in your accounting system the way you would expect. Once you’re happy with the way the invoices appear in your accounting system, you can switch on processing. For Xero, you will want to change the invoice status to Authorized (unless you have a good reason not to) under Destination Settings, as you will otherwise need to manually mark invoices as approved in Xero. This does not apply to QBO.
Finally, switch on Processing and click the Save Changes button again. Synchronisation will then begin automatically.